
How the connection works
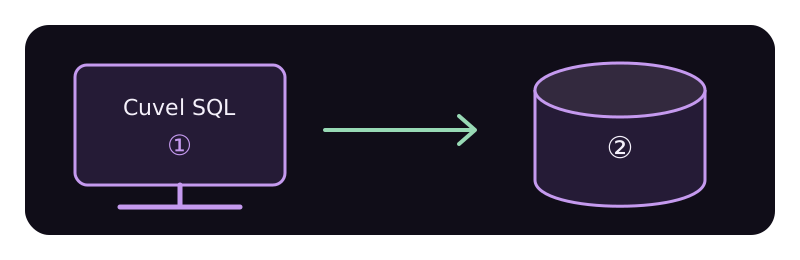
Before you begin
Obtain the database type, host, port, username and password from your administrator or database service. PostgreSQL also requires a database name. For SSH, prepare the SSH host, port, user and authentication details. Prepare a CA certificate if required by your service.
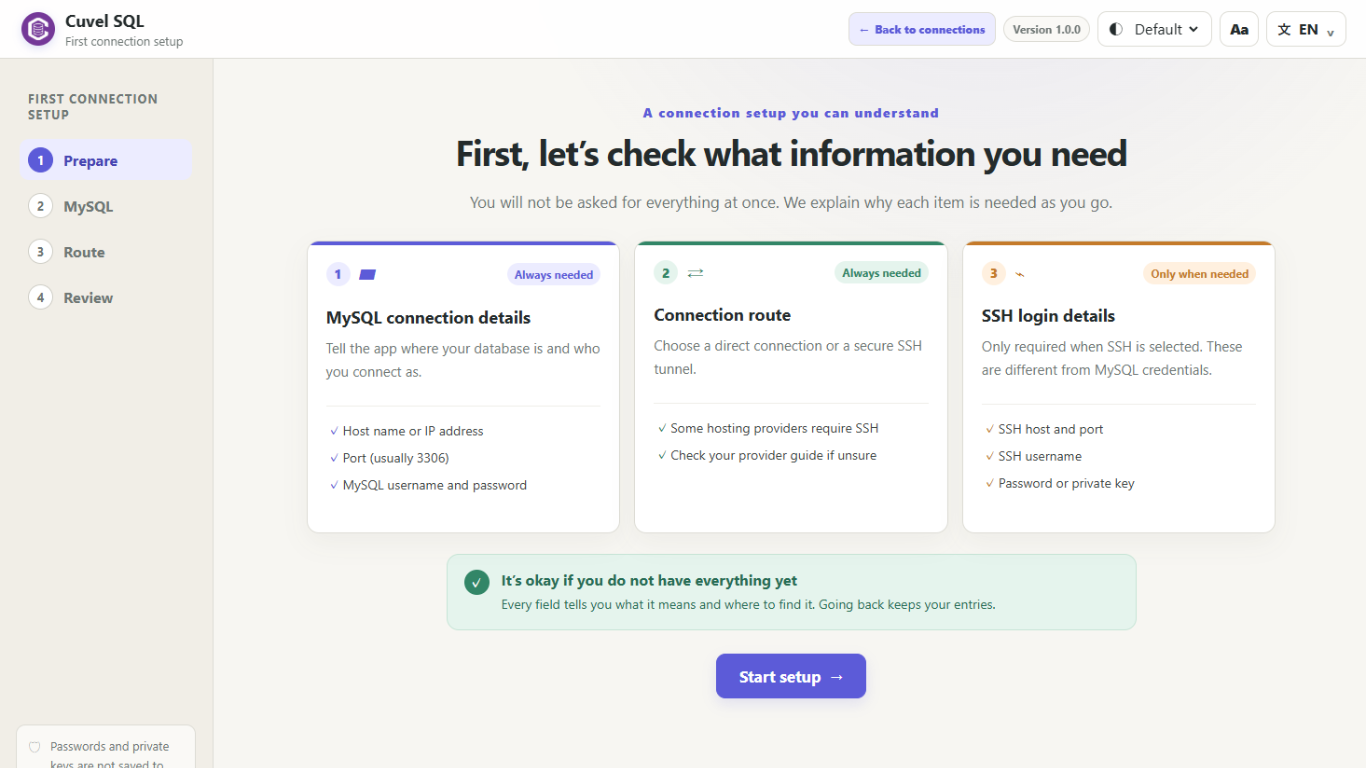
01 Install the app
Open Cuvel SQL in Microsoft Store, follow the installation instructions, and launch it. Installing Cuvel SQL does not create a database server.
Get it from Microsoft Store ↗02 Enter database details
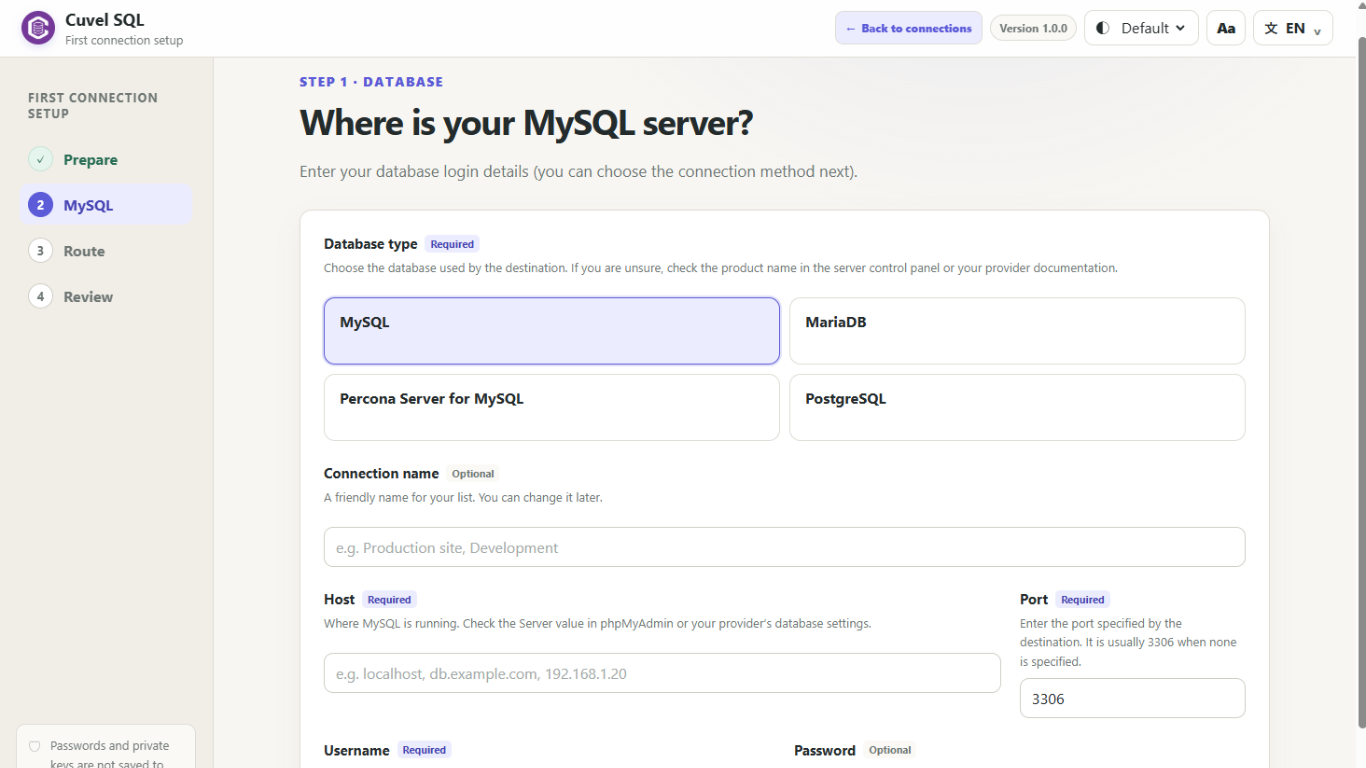
Start a new connection from the saved connections list. Unlike other products, Cuvel SQL provides an easy-to-follow wizard. Select your actual database type: MySQL, MariaDB, Percona Server for MySQL or PostgreSQL. Enter the host, port, username and password. For PostgreSQL, also enter the database name.
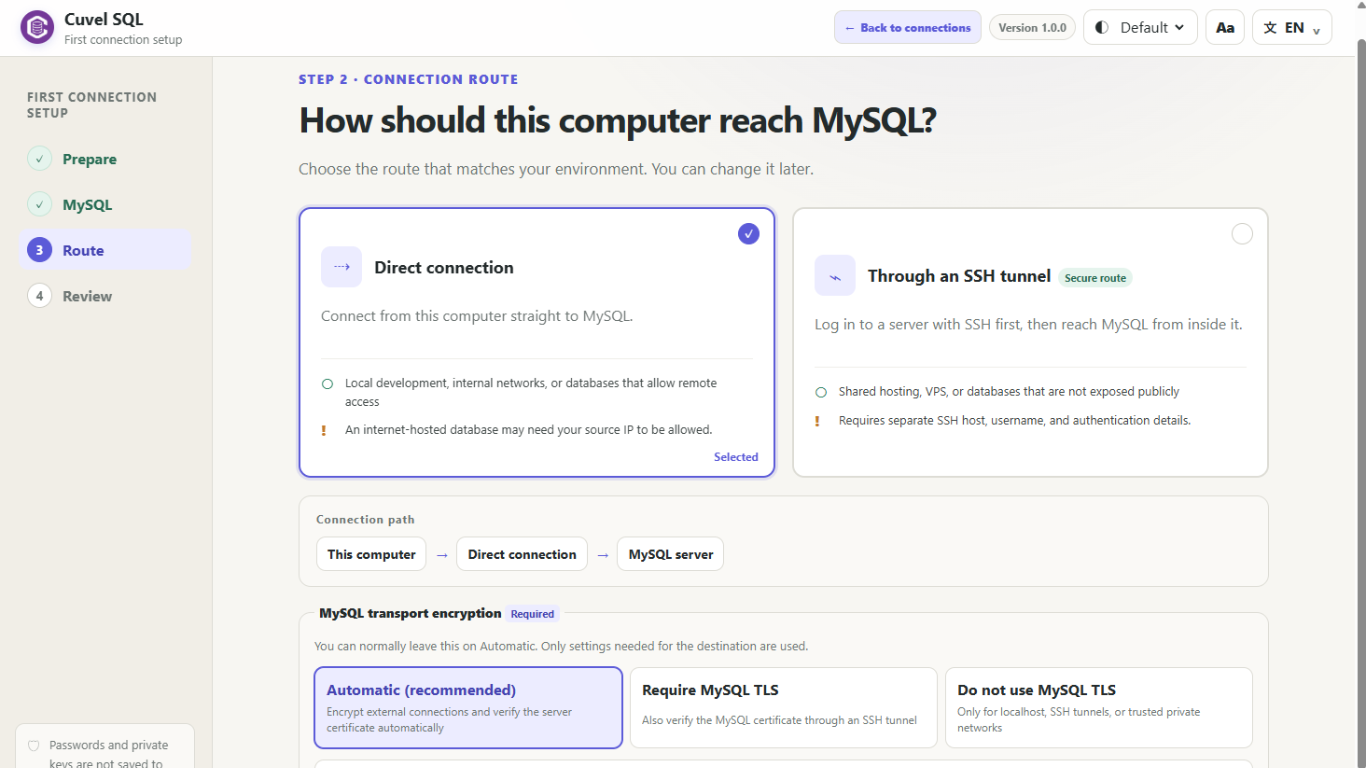
03 Choose the connection method
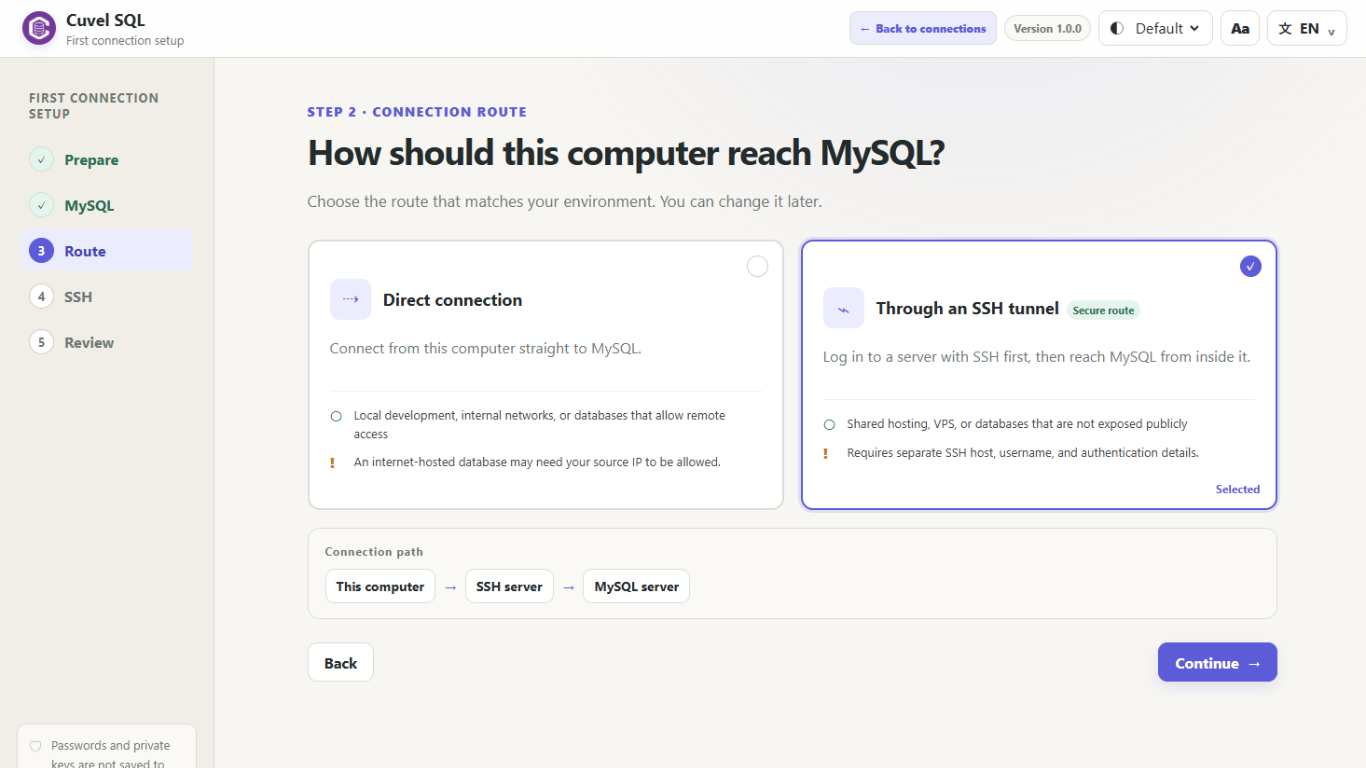
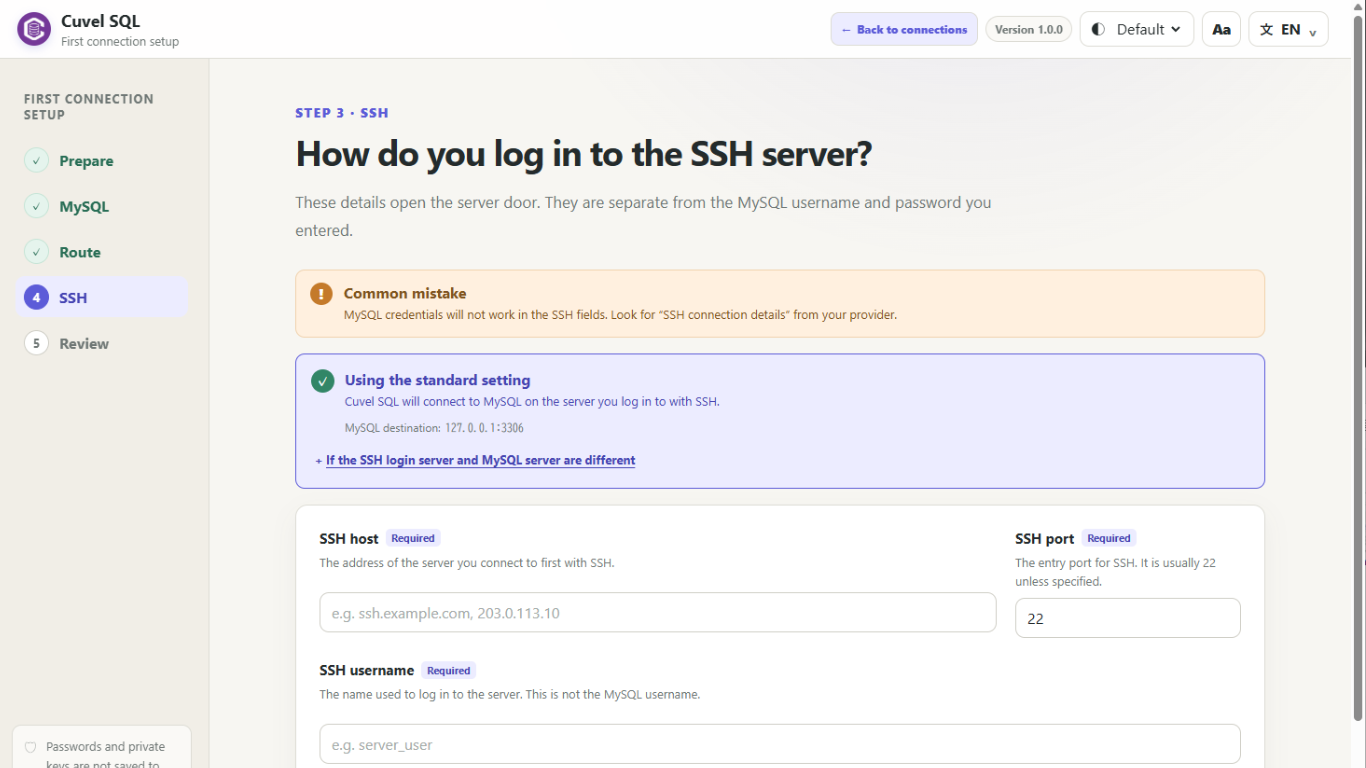
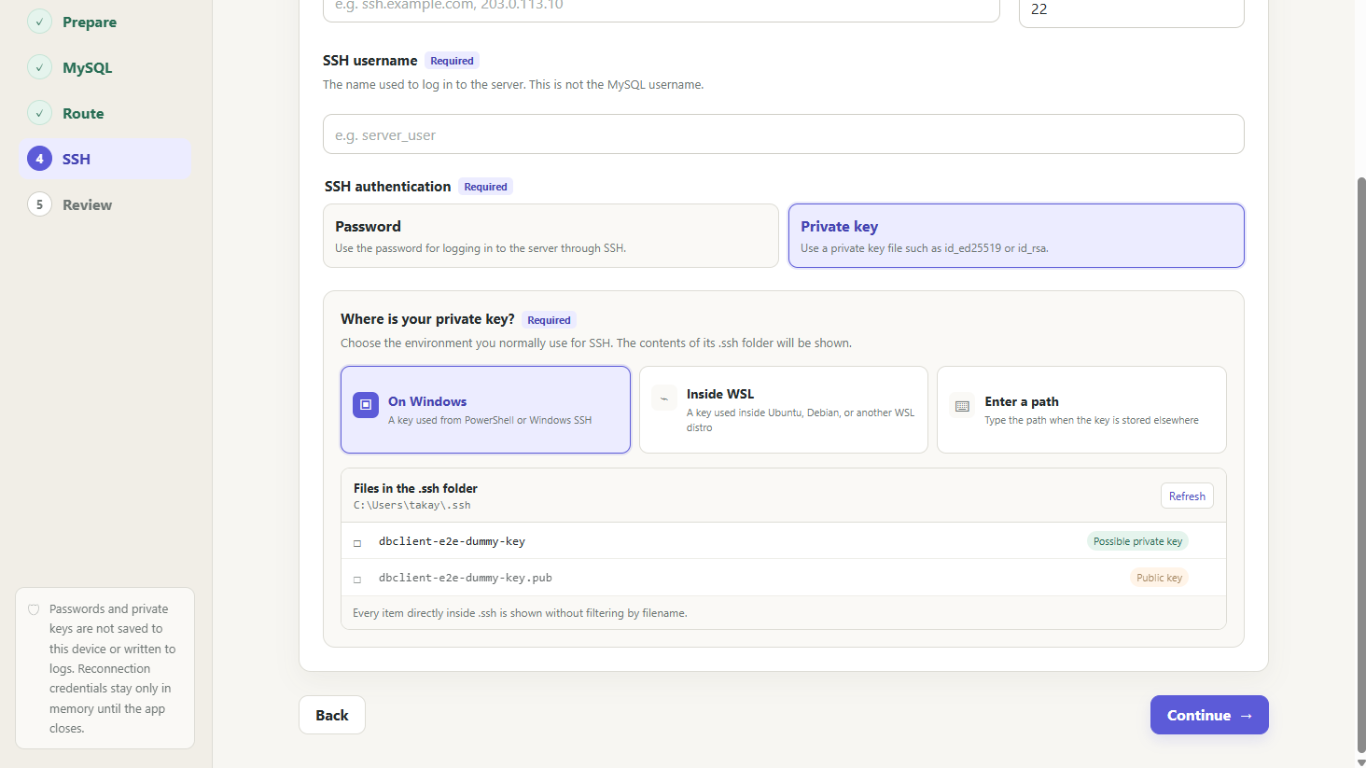
Choose an SSH tunnel if your environment uses SSH. Otherwise, choose Direct connection to connect to the database directly. Match encryption settings to the service requirements and select the CA file if specified. For SSH, enter the SSH details and password or private key on the next screen. Specify where the private key is stored on your PC, and the app suggests likely key files.
04 Review and connect
Check the destination and connection method on the review screen, then connect. If a certificate or SSH host key prompt appears, verify it against information from your administrator or service. If an error occurs, read the explanation and return to the relevant settings.
05 Save the connection
After a successful connection, choose whether to save it when prompted. Decide separately whether to save the password. If you do not save it, enter it on your next connection. Choose carefully what to save on a shared PC.
06 Open a table
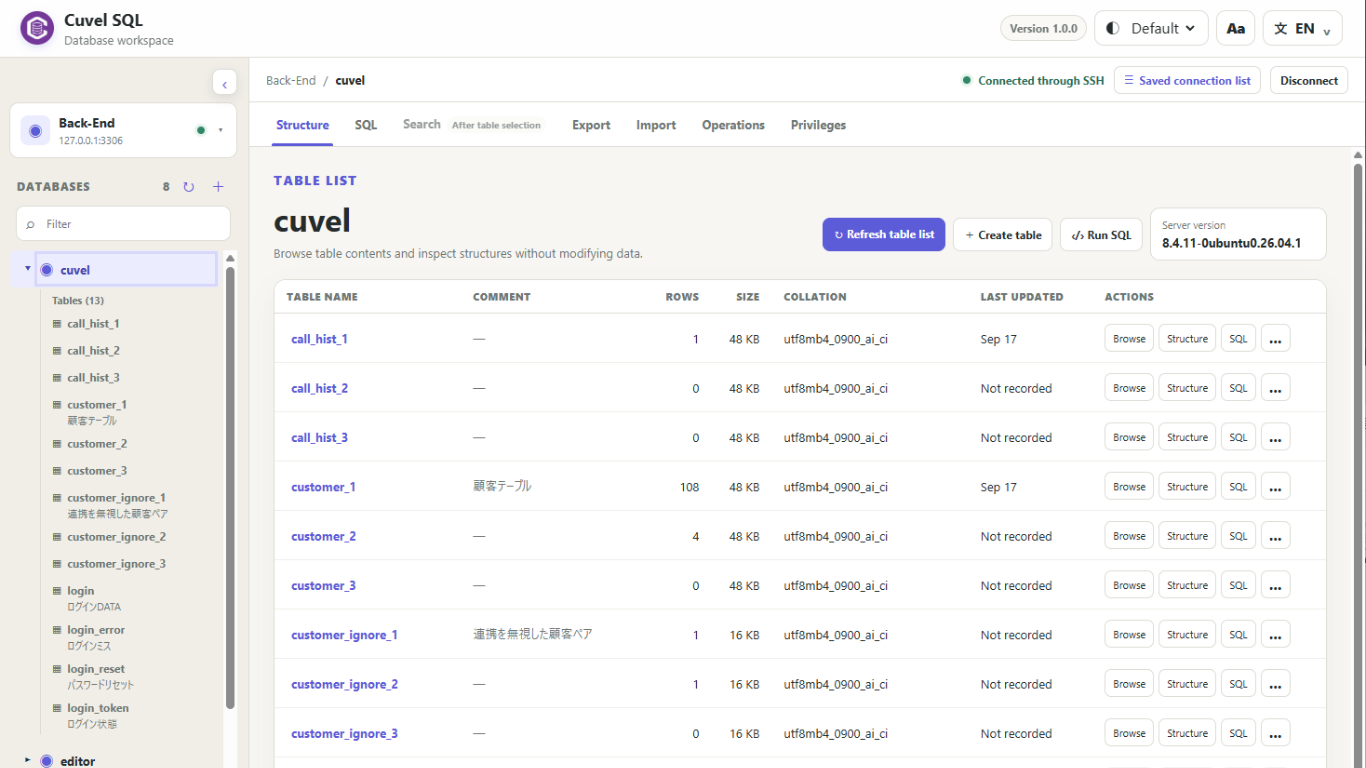
Select a database (and a schema where applicable in PostgreSQL), then a table in the left tree. You are ready when the records appear. Zero rows does not necessarily mean the connection failed. Review the data first and check the target before editing or deleting.
Useful input tips
The standard port is 3306 for MySQL-compatible servers and 5432 for PostgreSQL, but use the port provided by your service. For a direct connection, localhost and 127.0.0.1 refer to your own PC. Use the supplied hostname for a remote database.
If something goes wrong
Check the host and port, network and source restrictions, credentials, and TLS/SSH settings. If connected but databases or tables are missing, check the selected database/schema and user permissions with your administrator. Do not disable encryption just to bypass a certificate error.
Connecting next time
Select the destination from your saved connections. You will need to enter any password you did not save.